
Purchase Orders
Module Guide - A Deeper Dive!
Introduction
The Purchase Orders module within V5 Traceability allows customers to use existing or new suppliers to create and schedule purchase orders from within Control Center.
At the Control Center level, Purchase Orders can be printed, emailed to the supplier, suspended, or completed.
Scheduled Purchase Orders can be received or returned by operators using V5 WMS whether in part or as a whole. Controls can be configured to allow ‘under receive’ or ‘over receive’ of materials.
This guide will cover the whole Purchase Order process, from creating suppliers and orders down to how we receive inventory and place into stock.
Table of Contents
1. Supplier Setup
Before we get into Purchase Orders themselves, we can quickly touch on suppliers and how to create these in Control Center. Under the ‘Ordering’ header we can hit ‘Suppliers’ to bring up the main supplier window. From here we can use the top left panel to add (1) a new supplier. Here we can assign a supplier code to the supplier, as well as their name. The supplier code must be unique. We can also assign default payment and shipping terms (populated from ‘Order Info’), the default currency that the supplier is paid in, and whether orders from this supplier will require a signature on arrival.
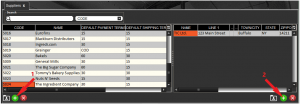
We can also use the top right panel to add (2) any relevant addresses and contact information for invoicing the created supplier. Emergency Recall details can also be entered here.
We could finish setting our supplier up at this point and we would be able to set up purchase orders for any commodity from them. However, we can add further details to our suppliers that can help streamline the ordering and receiving process.
We can first use the bottom left panel to add (1) commodities to assign to this supplier. In this case, let’s assign Salt to ‘The Ingredient Company’ that we created in the top panels. We can use either the ‘commodity code’ or ‘description’ drop-down menu to select a commodity.

‘Cost’ will populate from the value set in ‘Commodities’, but this can be changed here if the particular supplier has a different price set for this item. Units cannot be changed here. We can also enter information such as the item’s supplier part number and UPC.
Finally, we can go a step further and add (2) a container to the bottom right panel that this commodity from this supplier will automatically be booked into, if this is known ahead of time. The automatic tare function can be particularly useful when we are receiving the same item over and over again and we know that it comes in a container weighing (in this case) 5lbs.
For a container to be eligible for selection here, it must be set up as a ‘Container’ type in the ‘Containers’ section of Control Center. Tare values must also be set here.
If you are unsure of the use or definition of each column, a full guide can be found here.
2. Purchase Order Creation
Purchase orders can be created on the ‘Purchase Orders’ page of Control Center, under the ‘Ordering’ header. We begin by creating the order itself in the top panel (1) after which a new order line will be generated and have its order number automatically filled in sequentially from the last order that was created. This format can be changed to suit a customer’s needs.
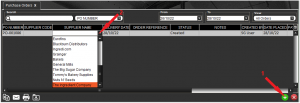
From here we can select our supplier, using the drop-down menus in either the ‘Supplier Code’ or ‘Supplier Name’ (2) column. We can also select a delivery date for the order, and enter any reference number that we might have been provided from the supplier. We can also change the order placed date for future orders. Other information here is largely populated from the information we entered against the supplier above. Note how at this point the purchase order’s status is ‘Created’, meaning that it won’t yet be visible to receive in WMS.
We can then go to the bottom left panel to add (1) commodities to the order.

We can then select what commodities to add to the order using the drop down menu in either the ‘Commodity Code’ (2) or ‘Commodity Description’ panel. Note here how, since we only assigned salt to this supplier, we can only select this here. Once the commodity is selected, the rest of the row will populate. The cost here is pulled from the cost of the commodity when it was assigned to the supplier as we saw above. We can then enter the quantity that we are ordering (here we will go for 500lbs)

We can also enter an expected delivery date against the individual commodity. This could be useful if we are ordering more than 1 commodity and the supplier might need to ship commodities out at different times.
Once this is done and we’re happy with all the entered information, we can go back to the top panel, right click the purchase order line, and hit ‘Schedule’.

The purchase order will now be scheduled, and will now be visible in the WMS app.
You may have noticed that there is a 4th panel in the bottom right of this window. This comes into play once the purchase order is complete, so we will come back later and cover exactly what this does.
3. Receiving Purchase Orders
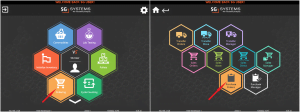
First we need to login to WMS, and then, after hitting the ‘Ordering’ hexagon, we can select ‘Purchase Orders’ from the main ‘Ordering’ menu.
On this next screen we will see any active purchase orders in the top panel, and the associated commodities for that order in the bottom panel. Since we’ve only set up this one order, this is all we will see at this time.
Note that we have the ability, by using the icons in the bottom left corner, to either manually search for orders via the looking glass icon, or to filter orders by date by using the calendar icon.
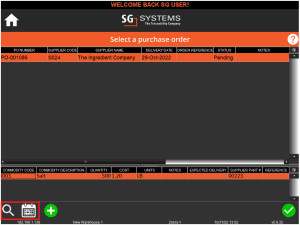
If we highlight our purchase order in the top panel and hit the green check mark in the bottom right corner, this will start the receiving process and we will be asked any Q&A or Q&A Group questions that are assigned to the ‘PO Start’ event. After this, we will be taken to the main commodity receiving screen.
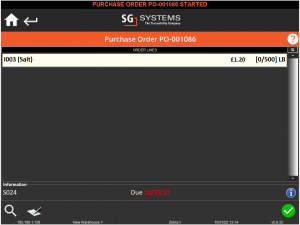
This screen will show a list of all the commodities expected on this order. In this case we only have 1 line for the salt we ordered. If we select this salt line, we will be taken to the next screen.
At this point the system can prompt for a number of different inputs, such as location, lot number, supplier lot number and container selection. For a more complete list of what can happen here, please click here.
We will then be asked to provide the quantity we are receiving. This can be done via key entry, scale, or bulk entry. Which one is displayed by default can be set in the WMS configuration. More information on these screens can be found here (link to inv functions). The system can also prompt for other information such as lot/supplier lot numbers at this stage, or these can be assigned automatically by V5 Traceability.
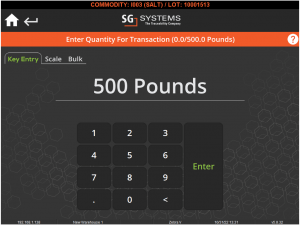
Once we have entered this, and if the function is enabled, a label will print and you will return to the following screen.
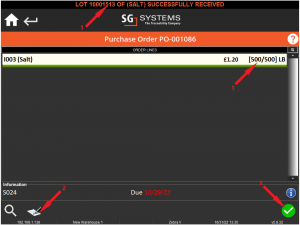
Here we can see that our 500lbs of salt has been successfully received (1). We can then use the signature icon in the bottom left (2) to open a screen to enter the delivery driver’s name and signature, if this is required for that particular supplier (the system will not allow us to complete (3) the order if this is required but has not been supplied.)
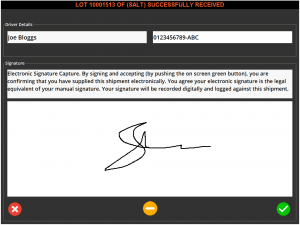
We would continue to receive other commodities in this fashion until all lines have been received. To complete the order, we can hit the green check in the bottom right.
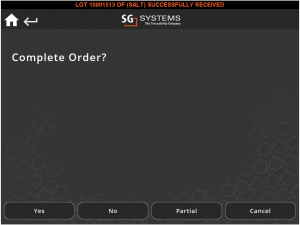
Note here how we can partially receive an order. This is useful if, as discussed above, we ordered multiple items on one order and some might have different shipping and delivery dates. Partially completing an order will leave it visible in WMS so it can be completed, whereas completing the order will remove it from WMS’s list. Let’s go ahead and complete this order. If we have any Q&A or Q&A Group questions assigned to the ‘PO Complete’ event, these will be asked here.
If we now return to Control Center and look in the bottom right panel of this window, we will now see that it has been populated with lot information for the received commodity.

3.1. Augmenting Existing Lots
When receiving non-palletized goods, we have the option to augment existing lots while receiving. Note that to use this, both manual lot number and supplier lot number must be enabled for WMS. SG Support can assist with enabling these options.
Let’s take a quick look at how this would work. In this example we have already received 1000lbs of yeast, and entered a lot number of ‘SG001’ and a supplier lot number of ‘SUP001’. We can see this inventory.

So if we were to then receive another order for another 1000lbs, we can enter the same lot and supplier lot numbers that we did for our first received:
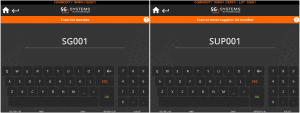
We would then be given the following options (note that expiry entry is not requested again – if this option is enabled – as the system will take the expiry date from the first received lot).
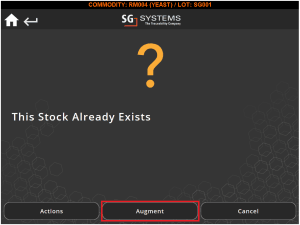
Hitting ‘Augment’ here will add this lot into the already received lot. Once the order is complete we will see that we not have 2000lbs in inventory. Hitting ‘Actions’ here will bring up the WMS lot manager screen.

4. Receiving Palletized Goods
In the example above, we are receiving salt, which is a containerized product in the system we are working with here. But what if we are receiving palletized goods?
The steps are largely the same as we see above, but let’s quickly run through the differences if we set up another order for 500 bags of flour, which is marked as palletized in our database.
We can set this up and begin to receive it in much the same way as we saw above, but in this case, when we come to receiving our flour on the commodity receiving screen, things will behave slightly differently.

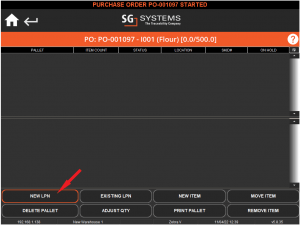
After hitting this line to receive our 500 bags of flour, the system will open the pallet dialogue rather than the key-in weight entry screen we saw above. Here we can scan an existing pallet to use this for, or we can create a new pallet. Let’s create a new pallet (or ‘New LPN’) in this case.
We’ll then be asked for the number of pallets we are receiving, and how much of the commodity will be on each pallet. Here we will imagine that we are receiving 4 pallets with 125 bags each.
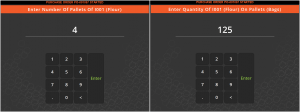
Once we have entered this information the system will ask us to confirm what we have entered, before taking us back to the commodity receiving screen, and we can see that our flour has successfully been received.

Hitting this again will take us to the pallet management screen for the pallet we have just created, where we can see the pallet number and other associated information.
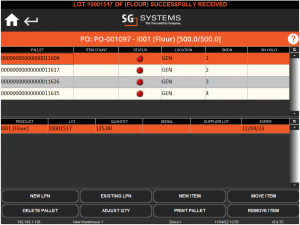
We can then complete the order in the same way as we saw above. In Control Center we will see much the same info in the bottom right panel in ‘Purchase Orders’ as we saw above, just this time the LPN field will be populated by the license plate number of the pallets we just created.

5. QA & Purchase Orders
As with many events in V5 Traceability, purchase orders can have QA questions assigned to them. This can be done in Control Center and there are 4 specific events that relate to purchase orders. These are:
- ‘PO Start’ – Triggered at the start of a PO.
- ‘PO Start and Resume’ – Triggered at the start of a PO, or when a suspended order (if partially received for example – see below) is resumed.
- ‘PO Partial’ – Triggered when a PO is partially received i.e. the order lines are not complete when an operator completes the order.
- ‘PO Complete’ – Triggered when a PO is fully completed and closed out.
We can use the following 3 questions in QA to see how this would work.

The first question here is set to the ‘PO Start’ event in the QA top right panel, the second the ‘PO Partial’ event, and the third the ‘PO Complete’ event.
If we head back to WMS and look at another purchase order, we can head to the main purchase order window to see our new order.
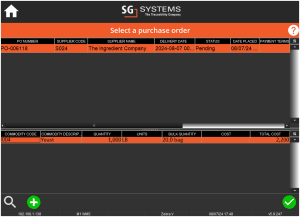
Once we select the order and hit the green check, the ‘PO’ event will trigger, and we will be asked our first question.
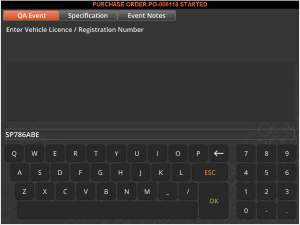
Here we set the question up to allow a custom response, giving the WMS operator a freetext box to enter the vehile registration details. Once this question is answered the operator can begin to receive goods against the order lines.
Once this is done, and if the order lines were not fully completed then the operator can partially receive the order. Note that an operator permission (‘allow under receipt’) and a WMS configuration is required in order to allow this.
When partially receiving, this triggers the ‘PO Partial’ event, presenting the operator with the relevant question.
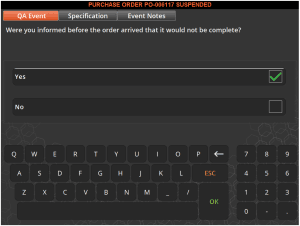
This will then suspend the order, allowing it to remain visible to WMS for it to be completed at a later date. If this order is then reopened then any ‘PO Start and Resume’ associated questions will be asked.
If the order is fully received however, then the ‘PO Complete’ question will then be triggered.
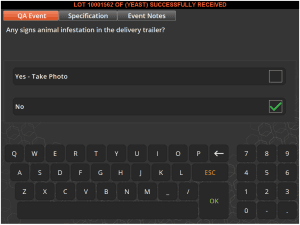
Note here that we can set orders to terminate the process and notify managers/supervisors if this question was answered with a ‘yes’.
More information on how to do this, and other features of QA, see our module guide on the topic here.
6. Returning Orders
From here, if there was an issue with this order once it has been received, and if the user has sufficient privileges, we can return items here by right clicking the relevant commodity line (1).

We will then be asked to provide a reason for this return (2), before confirming the quantity to be returned (3).
Another line will then be added in CC, showing this stock deduction. Any provided reasons will appear on reports.

7. Managing Purchase Orders
Purchase Orders can be managed via the ‘Purchase Manager’ function under ‘Ordering’ in WMS.
To learn more about the options available here, please click here.
