
Wave Picking
Module Guide - A Deeper Dive!
Introduction
Wave picking, also known as cluster picking, is one of several order picking systems used in V5 Traceability to improve efficiency. It involves releasing specific orders to the warehouse for fulfillment, based on a common factor such as shipping date, like items, warehouse zone, etc.
Rather than scheduling a number of pickers per shift and then hoping that orders flow accordingly, wave picking helps teams to meet specific commitments, such as filling a set number of orders per shift or meeting a shipping deadline.
To do so, wave picking focuses on when orders are picked. Management aligns short picking intervals, or waves, that correspond with other warehouse variables, such as the transportation plan or departure schedule.
V5 Traceability supports Wave Picking for high volume B2C scenarios – enabling shippers to be as productive and efficient as possible. B2B users with low volume shipping requirements normally utilize the Sales Orders setup.
Table of Contents
1. Setup
Firstly, to demonstrate this feature, we would need sales orders and sufficient stock to fulfil them.
In this example we will use 2 identical orders:
- SO-001065 –
- 75x 12-pack of buns
- 25x 6-pack of buns
- SO-001066 –
- 25x 12-pack of buns
- 75x 6-pack of buns
Secondly, we would require stock to fulfil the order, so here we have 2x pallets of products that we can source from:
- 12-pack of buns x100
- 6-pack of buns x125
Finally, we would also need to ensure that our stock of finished goods is stored in the ‘rack’ type location, and that these locations are set up properly to correspond to the layout of the physical storage spaces. More information on this can be found here.
Both staging and dock locations would also need creating.
With our sales orders created and scheduled, we can now use WMS to begin the wave picking process.
2. Allocation Phase
In WMS we should first hit the ‘Ordering’ hex, followed by the ‘Sales Wave’ hex.
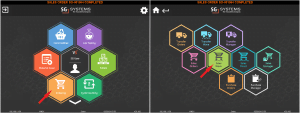
We will then be shown a list of currently scheduled sales orders. We would then use the ‘selected’ checkbox (by default on the far right of this window) to select the orders we want to wave pick.
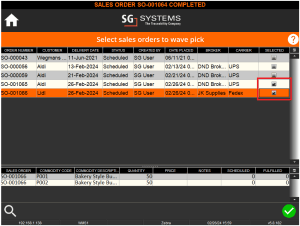
We can then use the green check to begin to process these orders. On the next window we would then select the ‘Allocate’ button.
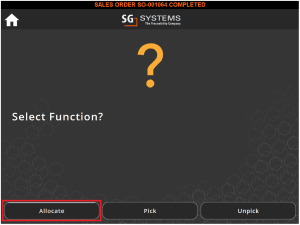
We will then be asked to scan out first pallet. The system will make use of the X/Y/Z coordinates of the racks, as well as the ‘Distance’ column to prioritize which pallet to scan first.
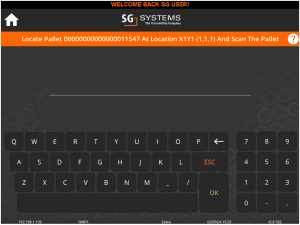
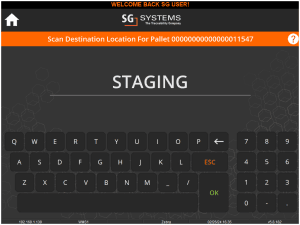
Upon scanning this pallet, we will then be asked to scan the destination location for this pallet. In this instance we will imagine that we have 1x ‘staging’ location and 2x ‘docks’, so we will scan the ‘STAGING’ location to move this pallet to.
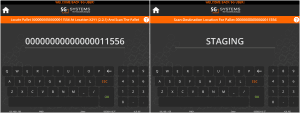
We would then be asked to retrieve the next pallet from storage, so again we will scan this into the ‘STAGING’ location.
Once we have scanned all our pallets into the staging location, the allocation wave will be completed.
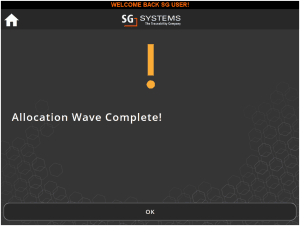
We can now move on to pick the items for each order.
3. Picking Phase
Once we have allocated all the required stock for the orders, we can then repeat the first steps outlined in the allocation phase above, so heading to ‘Ordering’ > ‘Sales Wave’, selecting the orders, but then at the next screen we will instead select ‘Pick’.
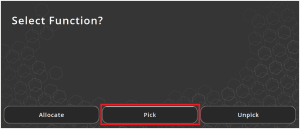
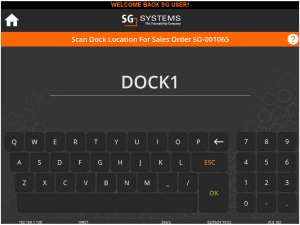
We will then be asked to scan Dock locations for our 2 orders. In this case we will use ‘DOCK1’ for ‘SO-001065’ and ‘DOCK2’ for ‘SO-001066’.
From here we will get 2 options, whether to load the order directly to the delivery trailer (if this has arrived), or to load the order to the dock (if the trailer hasn’t arrived yet).
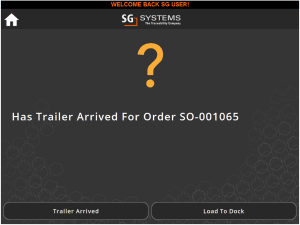
So let’s do 1 of each here, imagining that the trailer has arrived for the first, but not the second, order.
So we will hit ‘Trailer Arrived’ for the first order. We will then be asked for a trailer and seal number, which will be followed by any associated ‘PO Start’ Q&A that might be set up.
(Note that trailers must be enabled for the ‘Trailer Arrived’ option to be available. Contact SG Support for guidance in enabling this option.)
We will then be asked to scan the Dock location for our second order, so we will scan ‘DOCK2’ for this order. In this case we will choose to ‘Load To Dock’. Note that QA for this second order won’t be asked yet.
We will then be asked to scan a pallet in the staging location. We can choose any one of the pallets here and the system will automatically direct us what to do with it.
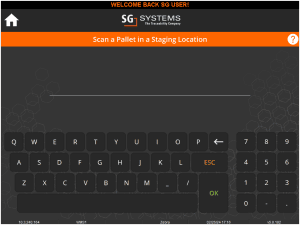
So let’s scan our pallet of 12-packs of buns first. Upon doing this we will be told to split 75 packs from this pallet. We can either create a new pallet here or join an existing pallet by scanning it.
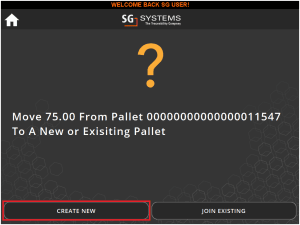
Here we will just create a new one, after which we will be directed to move this new pallet to DOCK1, where the trailer has arrived.
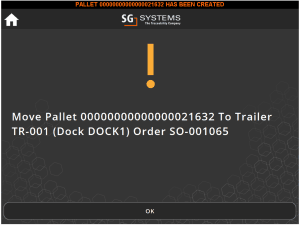
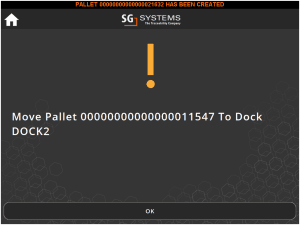
We will then be directed to move the original pallet to DOCK2. Note that we are not being told to split a certain amount off here, as the amount on the pallet is what is required for the order (the 25 remaining packs of 12-pack of buns).
We will then be asked to scan our next stock pallet of 6-pack buns from the STAGING location, when we will then be again asked to move 25 packs off this pallet, and again whether we want to create a new or join an existing pallet for our first order. Here we will join the pallet that we created above.
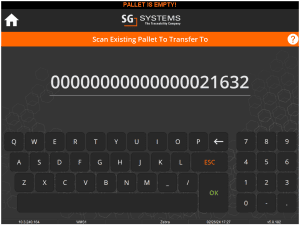
We will then be directed to move this pallet to the trailer, after which the order will ‘complete’ (more on this shortly).
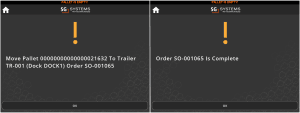
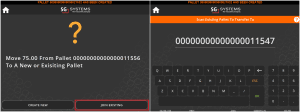
After this, we will then be asked to move the 75 packs for the second order to a new or existing pallet. Here we will ‘Join Existing’. Here we will move the packs off this pallet, and onto the original pallet that was used for the 12-pack of buns, as this is already being used for this order.
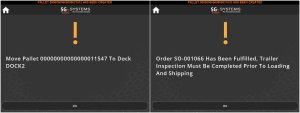
We will then be told to move this completed pallet to Dock 2 and told that the order has been fulfilled and we will need to undergo trailer inspection prior to dispatch. We will see the implications of this when we come to dispatch the different orders.
Finally, since the original pallet of 6-packs of buns contained 125 packs and we have used 100 for both of these orders, we will be asked to return this pallet to storage and scan a location.
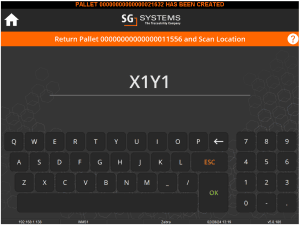
We will then be asked to scan another pallet in the staging location. This is designed so that if another WMS device is allocating while another picks, then the picking device can scan additional pallets that may have arrived in staging during the initial pick stage.
In this case though we can hit the home icon to exit the wave picking module.
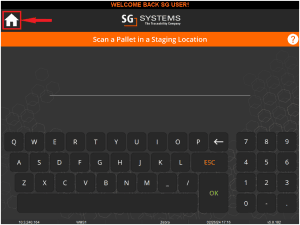
We can now proceed to the dispatch process for both of these orders.
4. Pallet + Item Movements
So if we follow the pallet and item movements from the whole process above we can see the process that was followed. Leading 0s removed from pallet/SO numbers for ease of following.
Pallets:
11547 – 100x 12-packs
11556 – 125x 6-packs
Both moved to Staging in allocation phase.
Picking movements:
11547 – 75 packs picked + moved from this pallet to new pallet 21632 for order 1065
11547 – Remaining 25 packs remain on this pallet + are picked for order 1066
11556 – 25 packs picked + moved to the new pallet 21632 for order 1065.
11556 – 75 packs picked + moved to pallet 11547 for order 1066.
11556 – Pallet and remaining 25 packs are moved back to storage X1Y1.
Leaving us with:
21632 – 75x 12-packs + 25x 6-packs – order 1065
11547 – 25x 12-packs + 75x 6 packs – order 1066
5. Order Shipping
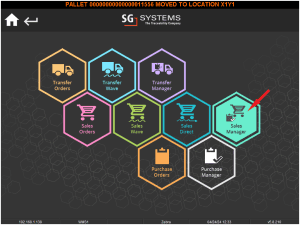
When coming to dispatch these orders, we would make use of the ‘Sales Manager’ function within the Ordering module. This can be accessed under the same ‘Ordering’ hex from the main menu, and then the ‘Sales Manager’ hex next to ‘Sales Wave’:
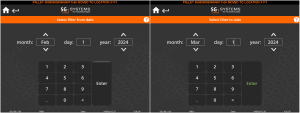
We can then use the manager’s date filters:
To find the orders that we have just picked:
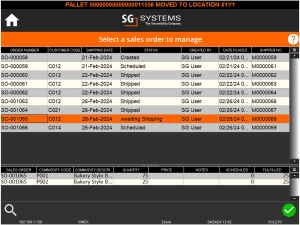
Note the different statuses of the orders we have picked here. We can see that order 1065 is set to ‘Awaiting Shipping’, whereas 1066 is still ‘Scheduled’. This is due to the way that we picked the orders above.
Highlighting an order here and hitting the green check will give us the management options available here:
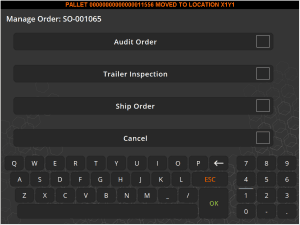
Depending on how we are picking orders (we saw 2 examples above), we have a couple of dispatch strategies available here:
- 1065 – Trailer has already arrived so the Sales Manager here gives a supervisor the ability to quickly dispatch the order via ‘Ship Order’
- 1066 – Since the trailer had not arrived when the order was picked, a supervisor can use ‘Trailer Inspection’ to undertake the trailer inspection/QA steps that were not asked at the picking stage. Then the order can be shipped via ‘Ship Order’ as above
Other functions of the Sales Manager are explained further in our Order Management module guide.
Note here that this is the default behavior of WMS, and that it is possible to have orders dispatch automatically once trailer inspection has been completed by the picking operator. This is available via a configuration change, so please contact SG Support to explore these options further.
6. Setting A Default Dock
We saw above that we used 2 docks for our example orders here, with the operator being able to choose which docks are used for which order. However, we can override this choice and specify a default dock that the particular WMS device will always use. With this setting enabled, the operator will not be given the opportunity to scan/manually key in a dock location, and will instead be directed to load to this default location after allocation.
This is useful if we have a scenario where there might be only 1 dock used for shipments, or there are multiple WMS devices that handle orders for individual docks throughout a customer’s facility.
7. Direct To Dock Mode
The Wave Picking module in WMS can also be configured to work in a ‘Direct to Dock’ fashion, whereby a configuration can be set for WMS where it will skip the allocation phase that we saw above (i.e. moving the pallets first to a staging location before moving to the shipping dock) and load items to be shipped directly to the dock location.
Let’s take a look at an example that uses both this ‘Direct to Dock’ mode, and with a default dock specified for our WMS device (in this instance ‘DOCK1’).
In this example we will have 1 sales order:
- SO-001066
- 80x 12-pack of buns
And in terms of stock, we have 3x pallets of this product that we can source from:
- 11547 – 30x packs – location X1Y2
- 21641 – 30x packs – location X1Y1
- 21650 – 30x packs – location X2Y1
We would start as we did previously by hitting the ‘Ordering’ > ‘Sales Wave’ to enter the wave picking module.

We would then select our order the same way as we did previously, making sure the ‘selected’ checkbox for that order is checked, and then start the picking process by hitting the green check to proceed.
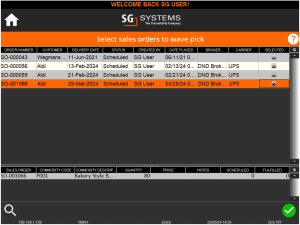
As before the operator will be directed to scan a pallet, in this case it is one of the two pallets that we have in the X1Y1 location.
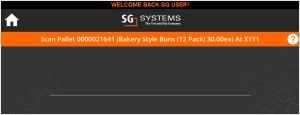
Note here that we do have the option to scan the other pallet that we have in this location. For this to be allowed however, the pallets need to not only be in the same location with the same product, but also, the lots of the desired product must have the same expiry date as the lot we are being asked to scan.
This is the case in this example, so let’s scan our other pallet:
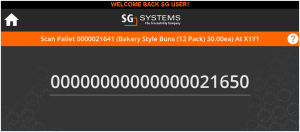
With this pallet scanned, we will now have the option of moving this pallet to the dock, or to keep it on the operator’s fork lift.
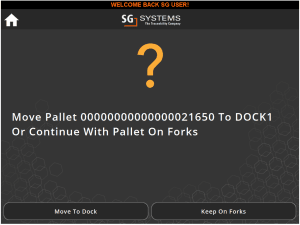
In this case we will move it to the dock, which again is being selected via the WMS settings to be ‘DOCK1’.
With this done the system will then ask us to scan the same pallet that it asked for originally, so this time we will do that, and when given the same option as above for whether to ‘Move to Dock’ or ‘Keep on Forks’, we will select the latter this time and keep that pallet on the forklift.
So now we have our first pallet already in the dock, and our 2nd pallet is on the fork lift. The system will then ask us to scan the last pallet, in the X2Y2 location.
Upon scanning this last pallet, since we already have 60 packs of our buns scanned onto the order (30 from each of the 2 pallets that were scanned first), we will be asked to move 20 off the final pallet, and we would get the same options we had above, to move to a new pallet or add to an existing one. However, now we also have the option to move this remaining quantity to the pallet that is already on the forklift.
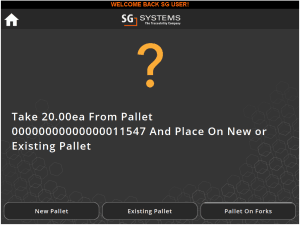
Note that here, unlike the process shown above, we will not be asked to put the pallet we are moving items from back in a location, as it is assumed that we are keeping it in its original location and we are just moving stock off it to our pallet on the forklift.
With this done we would then be notified that all pallets have been picked and we can now dispatch the order.
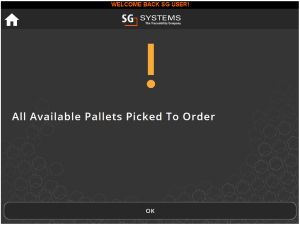
- Automatically dispatch the order.
- Require trailer inspection and dispatch from a supervisor.
- Require dispatch from a supervisor.
See the order dispatch section above for more information on this.
