
Revise Step
Module Guide - A Deeper Dive!

Introduction
The ‘Revise Step’ functionality in V5 allows for batches to be put on hold pending tests being performed on a sample sent to a lab. Lab Technicians can then make adjustments to a batch that are then sent back to the production Terminal for amendments.
This process can be repeated as many times as necessary to obtain the ideal mixture for a batch.
Table of Contents
1. Setup
We can set up a ‘Revise’ step in Control Center, in the ‘Formulas’ section. We would need to possess the appropriate user permissions to edit formulas to be able to do this.
If we navigate to the formula we want to add a revise step to, in the lower, step editor, panel of the formulas window, we can use the lower panel’s controls to add a new line to the formula. This step can sit at any point in the batch’s production, but for this example we will add this step at the end, giving us the opportunity to test, and potentially alter the makeup of the batch as the final step before it is finished.
For this example, we will use a formula for ‘Aspirin Tablets’.

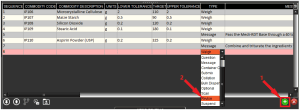
To begin to set this up with a revise step at its end, we will use the lower panel add/remove line controls to add another step (1). We would then select the ‘Revise’ option from the drop down menus in the ‘Type’ column (2).
We would also need to set up a question for this step under ‘Q&A’. Here we’ll create a question ‘Are Any Batch Revisions Required?’ We will set this up as below, with a ‘Yes’ and ‘No’ answer, and we would need to set the ‘Yes’ answer as ‘Terminates’. We will also ‘Require Additional Comments’ for this ‘Yes’ answer so that our lab technician can enter reasons/test results that necessitated a batch edit. Note that no event associations are required for this question in the top right panel of ‘Q&A’.

Once this is set up we can add it against the revise step we just created, under the ‘Message’ column.

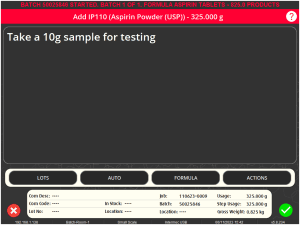
We could also create a message in ‘Q&A’ to tell our Terminal operator how much of a sample to send for testing. In this case, we will ask them to take a 10g sample to the lab. This would be entered in the formula step editor as a ‘Message’ step, and can sit just before the revise step. This would leave our final formula setup looking like this:

With these changes to our original formula in place, we would also need to ensure that our batch and lab operators have the correct permissions in place to permit the revision functionality.
In this case the only permission that both operators would need to have are ‘Edit Batches’. No additional supervisor level permissions are required.
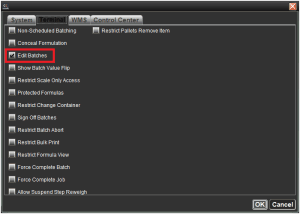
With formula and operator setup complete, we can now proceed to see how this would work when a batch is produced.
2. At The Batching Terminal
For our first run through, we will be using 2x Terminals used by 2 different operators, a ‘Batch Tech’ and ‘Lab Tech’. Configuration changes will also be needed for our ‘Lab Terminal’ to enable the revision functionality. Contact SG Support for help setting this up.
In this example, to help differentiate the 2 processes the ‘Batch Tech’ Terminal will display red, and the ‘Lab Tech’ Terminal will display orange.

If we schedule a single batch as we would normally (see our scheduling module guide for more info), then we can head to our batching Terminal. As normal, the operator will see the scheduled job and can start and proceed with batching.
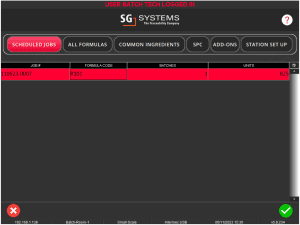
Our Batch Tech would then proceed to produce the batch as normal, after which they will reach the 2 steps that we added in the setup section above, first being asked to take a 10g sample for testing.
After which they will be told that revisions are required based on the results of the Lab Tech’s tests.
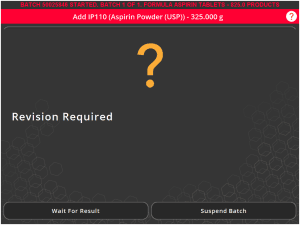
The Batch Tech then has the option to either wait for the Lab Tech to perform their tests, or suspend the batch, which would return them to the Terminal’s home screen and allow them to undertake other jobs while waiting for the results to come back. Here we will hit ‘Wait For Result’ which will show the formula summary screen while the Lab Tech performs their tests.
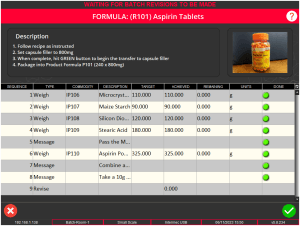
3. At The Lab Terminal
With the batch suspended for revisions on the factory floor, the 10g sample taken by the operator above would be delivered to the lab for testing. In this lab we would have a PC with a V5 Terminal installed which the Lab Tech can use to make amendments to the batch after they have performed their tests.
Upon logging into the Lab Terminal, the operator here would see the suspended batch under ‘Scheduled Jobs’ as they would normally, but when resuming the batch they will be asked the question we set above, ‘Are Any Batch Revisions Required?’. In this case the lab operator will have performed the appropriate test(s) on the sample provided from the floor, and come to the conclusion that the batch does require revisions. Of course as we have seen with the setup of the Q&A, this question can be fully customized to ask for a specific test (pH etc.) with pre-defined answers.
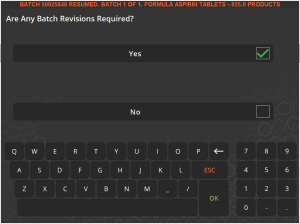
After selecting yes, and given the way we set this question up above, the lab operator can then enter further details against this chosen result.
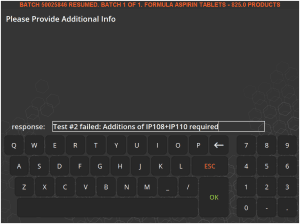
After entering their response here, the lab operator will then be taken to the step edit screen.
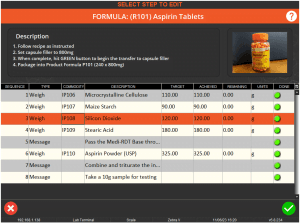
This screen is quite similar to the formula view than an operator would be able to see while batching, but here it allows our Lab Tech to perform positive additions to the active batch. As indicated by the response entered above, our lab operator could highlight Silicon Dioxide (IP108) and hit the green check to enter an amount of this ingredient to add.
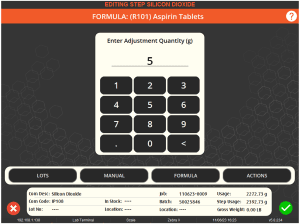
Here the lab tests have determined that a 5g addition here would be correct. The lab operator can enter this here. The Lab Tech would also do the same for Aspirin Powder (IP110) after determining from their tests that a 7.5g addition is required.
After performing these additions, the formula view would look like this, showing the adjustments visible in the ‘Target’ column
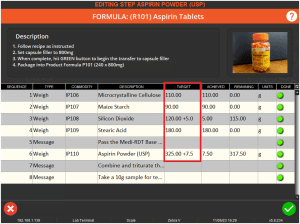
With these additions in place, the lab operator can then hit the red cross in the bottom left to finish the editing session.
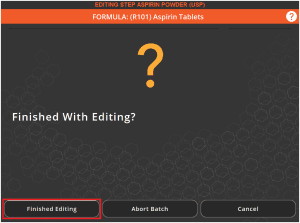
With this done, the Lab Tech’s work is done (for now), and the sample can be returned to the batching terminal.
4. Completing the Batch
With these edits made and confirmed at the Lab Terminal, our Batch Tech will now be able to return to their Terminal to resume the batch. If they selected ‘Wait for Result’ (as we did above) the batch will automatically resume once edits have been confirmed by the lab.
The Batch Tech will now be asked to weigh out the additions that were approved by the Lab Tech. Note that additions will be requested in the order that the Lab Tech added them.
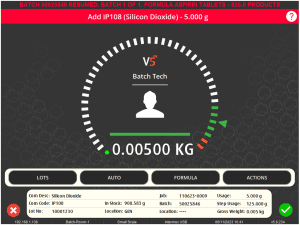
After all additions have been made the batch will again suspend for revisions.
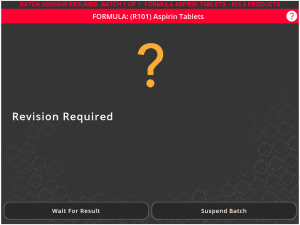
The Batch Tech would then send another sample back to the lab for testing. Further amendments could then be made to the batch by the Lab Tech, as we saw above, and sent back again to the batching Terminal for these to be added. This process can repeat as often as needed to get the batch balance correct.
Once the sample passes any prescribed tests in the lab, the lab operator can then select ‘No’ when asked if the batch requires edits. Selecting this option will subsequently allow the batch to be completed back on the production floor.
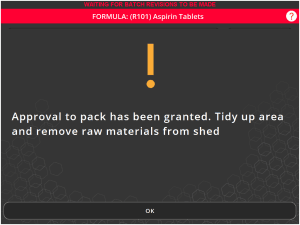
This message that is displayed above can be customized to suit any requirements.
5. Combined Mode
In the example above, we made use of 2 Terminals in different areas of the production facility, but we can also follow the same process at 1 Terminal if our Lab Tech is also performing the batching, and has the ability to test any samples down on the factory floor.
To make use of this mode, the Lab Tech must have the additional ‘Allow Suspended Step Reweigh’ permission enabled in Control Center.
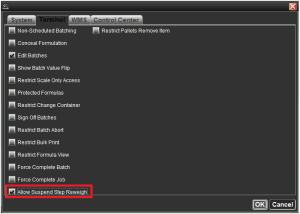
With this permission in place, we can schedule another batch of our Aspirin Tablets, and head to the same batching Terminal on the floor that we used in the last step. Our Lab Tech would log on to this Terminal and proceed to batch as usual.
When reaching the end of the formula steps and reaching the revision step, the Lab Tech will be shown the same screens as our Batch Tech saw previously, except now our Lab Tech will have an additional ‘Override’ button that can be used to proceed to our ‘Are Any Batch Revisions Required?’ question we saw before.
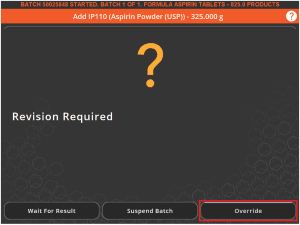
The Lab Tech can then decide that ‘Yes’ revisions are needed and input test results as above, after which they can make additions to the formula as before. The main difference here is that, after making any addition, the operator will be directed to weigh this out immediately before moving on to any more.
Once the Lab Tech is happy with the batch revisions, they can use the green check in the bottom right to end the editing session.
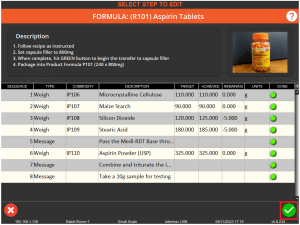
As before they can use the ‘Finished Editing’ button here to confirm that all additions have been made.
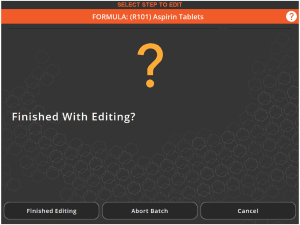
This will suspend the batch, after which the Lab Tech can resume the batch and be asked to repeat the testing/revision process again until the mix is correct and they answer ‘No’ to our ‘Are Any Batch Revisions Required?’ question. The batch will then complete.
Batch Signoff will also occur at both Terminals at the end of this process.
6. Reports
The most relevant report to this process would be the Electronic Batch Record (EBR) report. This report will show all the questions that were answered, as well as any adjustments made by the ‘Lab Tech’.
More information about how this report works can be found here in our reports guide section.
An example pertaining to this particular job can be downloaded here.
