HazardLink
Your Guide to V5 Integration!

The ‘HazardLink’ import endpoint can be used to quickly assign commodities to hazard groups within V5 Traceability.
This guide will focus on how to use this endpoint, both via CSV import and using JSON via the V5 API.
Table of Contents
1. Default Hazard Groups
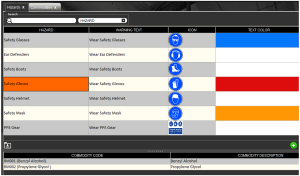
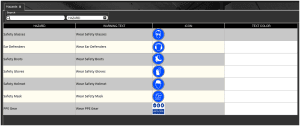
The default V5 database features a number of the most common hazard groups, but this endpoint can be used to create additional ones if required. The standard hazard groups that are included can be seen in the screenshot below:
This endpoint is not intended to be used for commodity creation, this should always be done via the ‘Commodity’ endpoint.
2. API Links
To find out more about the definitions for this ‘HazardLink’, and related database classes, please see the following link:
3. HazardLink Field Guide
3.1. Primary Keys
For both import methodologies, the primary keys are:
Hazard_Hazard – the name of the Hazard Group (i.e. Safety Glasses, Ear Defenders etc.).
Commodity_Code – The unique code of the commodity to be assigned to the Hazard Group.
3.2. Additional Fields
Other options here that we can add from the ‘Hazard’ database class are:
Hazard_WarningText – The text to be displayed to a Terminal or WMS operator when the commodity associated with a hazard is handled. Only necessary if creating new hazard groups.
Hazard_TextColor – Allows for a RGB number input to assign a color to the Hazard Group. Note that this should be the same for all commodities within the same Hazard Group. Also note here that when importing colors using this method, the RGB numbers do not need to be separated by commas (e.g. 219 125 33 instead of 219, 125, 33).
Note that this option is unavailable for the JSON methodology, unless creating a new hazard group via this endpoint. If modification of existing group colors is required, it is recommended to use the CSV endpoint.
4. Example Dataset
For this piece we will be looking at a simple example dataset featuring 2 ingredients that might be used during production:

- Benzyl Alcohol – Safety Mask (Orange) & Safety Gloves (Red)
- Propylene Glycol – Safety Glasses (Blue) & Safety Gloves (Red)
5. Methodology
5.1. JSON – Import
‘HazardLink’ import Endpoint/URI –
http://host:port/V5-API/api/integrate/import/hazard_link
Samples:
Using the ‘HazardLink’ endpoint, we can structure an import file for the above additions like so:
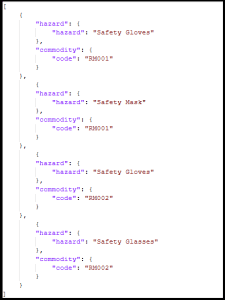
This sample JSON file can be downloaded here.
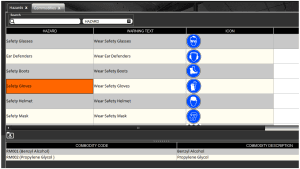
And once we have posted this to the system, we can see that all our commodities have been assigned to the correct hazard group, in this case we can see both commodities added to the ‘Safety Gloves’ hazard group.
5.2. CSV – Import
For CSV imports we first need to construct a header file for our imports.
Header/column definition filename: “hazardLink.csvh”
Completed header files should be placed in: “<installdir>\SG Control Center\gateway\import\column_defs”
Import CSV filename: “hazardLink-datetime.csv”
CSVs for import should be placed in: “<installdir>\SG Control Center\gateway\import”
Samples:
Header File:
An example header file can be seen below. Here we will be assigning our commodities to the defined hazard groups and also adding a color to the groups:

For further information on how we structure these files, please see the main integration page. This sample header file can be downloaded here.
CSV Import File:
We can then use the defined order of data points in the header to structure our import file. Note that this first row can be ignored by Control Center and so can be kept in the file when submitting for import. An example import based on our requirements above would look like this:
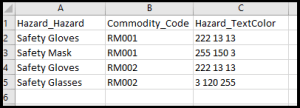
Note again that we do not need the commas that might normally separate RGB values. This sample import file can be downloaded here.
We can then drop this file into our import folder as defined above, and once the import is complete we can see that the hazard group text colors have been updated, and as above, the 2 ingredients are now added to the ‘Safety Gloves’ group:
