
V5 Server Installation Overview
V5 Technical Documentation

Introduction
Under normal, on-premises, deployment using a networked server, SG Systems will install and deploy software and services to this server based upon the customer’s outlined specification/scope. This guide is not intended as a step-by-step guide to be followed, but rather a summary of the standard actions that will be taken/software that will be installed by SG Systems when setting up and configuring a new deployment.
Further details can be made available upon request.
Table of Contents
1. SQL Server
1.1. Installation
SG Systems will, as standard, deploy the Express Edition of SQL Server 2017, although SG applications support the use of various editions and versions up to 2022 Enterprise depending on customer requirements/requests to use a different version.
SQL Server Management Studio will also be installed alongside the chosen server version to allow for database management. This can be any version up to the latest release (version 20).
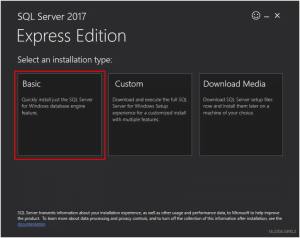
These installations will follow the standard ‘Basic’ install pattern when we run the installer.
Terms should then be accepted and an installation path chosen. Unless instructed otherwise by the customer this will be installed in the default location shown below:
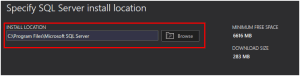
Once this location is chosen ‘Install’ should be selected. The installer will then download and install the relevant data.
Upon completion, various pieces of information such as the SQL Server instance name, version, connection string etc. will be displayed.
From here SG Systems will also install SQL Server Management Software, the latest version of which is available via the highlighted button which will open a download page for the latest version.
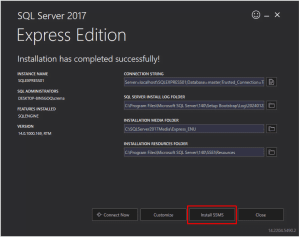
If SSMS is already installed, or is being installed from a separate installer, this window can now be closed.
SQL Server Management Studio
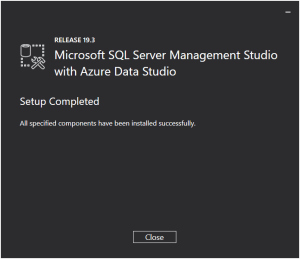
When running the SSMS installer, SG Systems will once again install this at the default location:

This installer will then be run and a confirmation message will show when complete.
1.2. Configuration
In addition to performing the standard SQL Server/Mangement Studio install described above, SG Systems will also make the following changes to the applications’ configurations to facilitate functionality with the V5 system.
TCP Port Setup
SG would start by opening up the ‘SQL Server Configuration Manager’ for the relevant edition of the server that was installed.
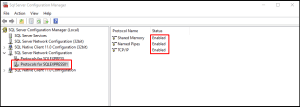
Once open and the correct instance of the server is selected on the left hand side, all protocols will be enabled, after which ‘TCP/IP’ will be right clicked and properties will be selected.
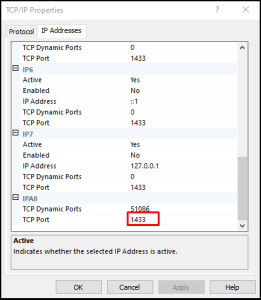
Here the ports for all ‘IPAll’ will be set to 1433. Other ports can be used here depending on the customer request/port availability.
The SQL Server service will then be restarted to apply these changes.
Microsoft SQL Server Management Studio
SG will then make the following changes in MSSMS:
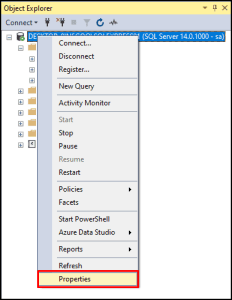
The server properties will be selected:
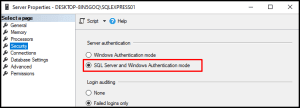
And on the ‘Security’ tab, server authentication will be set to ‘SQL Server and Windows Authentication’ and the setting applied.
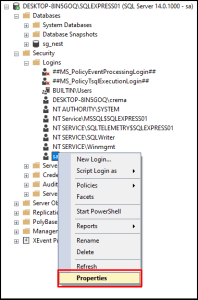
The ‘sa’ user (found under the ‘Security’ > ‘Logins’ menus) will then be edited (this is the default user profile that SG uses to sign into the database from the software and may not apply if using active directory).
On the ‘General’ tab here the SG default password will be entered (available on request), and ‘Enforce password policy’ will be unchecked.

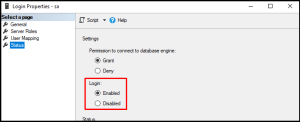
And on the ‘Status’ tab, login will be enabled and the changes applied.
An SG database can then be loaded from a backup.
2. SG Reports
SG Systems use a modified version of the Jaspersoft reports suite which will also usually be installed on the customer’s server as part of the initial software package. SG reports support versions of this software from 7.1 to 8.0. This package runs on an Apache Tomcat 8.0 web service backend on port 8080 so that users on the network can access these resources.
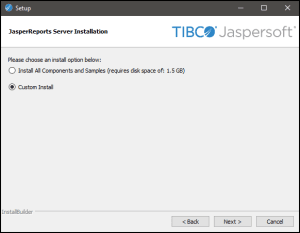
We would start installing the SG web reports by running the TIB_js-jrs-cp_*.exe and selecting ‘custom installation’.
Select the desired installation location (the default location is shown here):

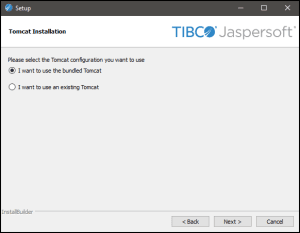
Select the bundled Tomcat option.
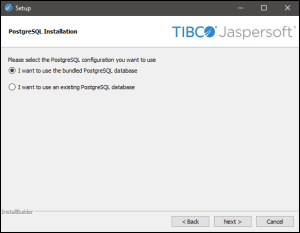
Select to use the bundled PostgreSQL database.
Select to use the bundled PhantomJS option.

Enter the desired Tomcat ports, the defaults are already populated. Note here that depending on whether the customer requires the installation of the V5 API, then depending on the order of installation the port here may be changed to 8081 or something similar. More information on installing the V5 API can be found here.

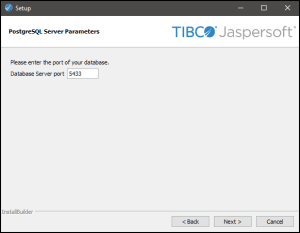
Select the desired database port, the default is 5433.
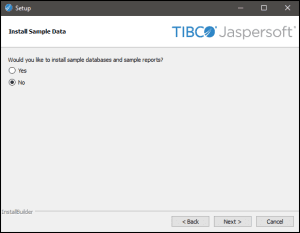
We don’t need the sample reports so we can just select No here.
More information on the subsequent use of the SG web reports can be found here.
3. Java
The V5 family of applications require the installation of Java Runtime Environment to function, and as such Java will be installed on any device that will be running a V5 application, including the server.
An SG representative will be able to recommend a Java version based on the system setup. This will either be Java 8 or Java 11 and guides for the installation of both will be discussed below.
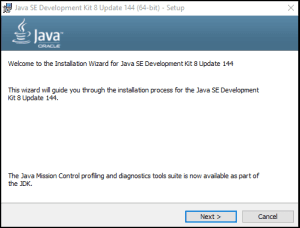
3.1. Java 8
The version installed here is the 64-bit Java 8 Update 144, but in reality any version of Java 8 will suit. Note that for WMS and Control Center installations, 64-bit Java (and hence a 64-bit OS) is required. Terminal is able to be run on 32-bit systems.
Booting the installer will prompt us to click next:
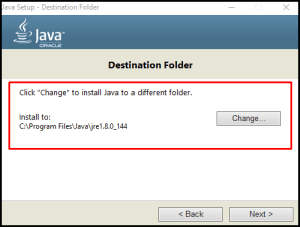
On the next page, and if using a Java version that includes the Java Development Kit (JDK), we can choose to omit the ‘Source Code’ element here, as only the Java Runtime Environment (JRE) is required to run the V5 applications.

The installer then downloads the appropriate files and then we will get an option of where to install Java. As usual, SG Systems will install this in the default location that the installer prompts.
Once the installer is run from here, the process will complete and the installer will be closed. We’ll now disable Java’s automatic updates:
In the Windows start menu, search for “Configure Java” and open it:

Click the Update tab > uncheck “Check for Updates Automatically” > Do Not Check > OK. This will prevent Java from automatically updating to a newer version that may compromise the V5 apps’ functionality.
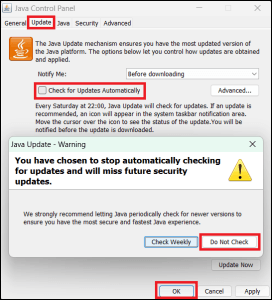
If the “Check for Updates..” checkbox is greyed out, you must close it and run it again but this time as an administrator.
3.2. Java 11
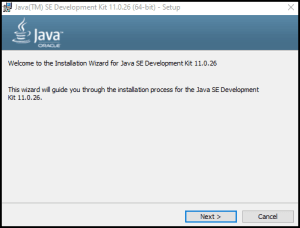
In instances where Java 11 is installed, please use the supplied installer for version 26 of Java 11 and run it.
After clicking ‘Next’ here please choose an install location – if a different one other than the default is required.
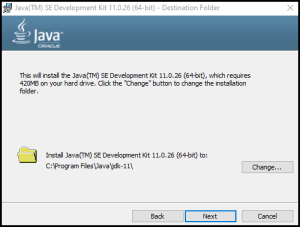
Clicking ‘Next’ here will then install Java 11 in the specified location and then complete. Click ‘Close’ to exit the installer.
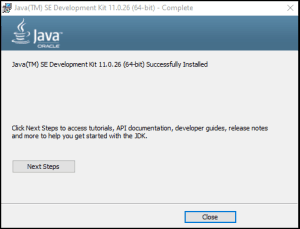
That is all the action that is required here, unlike for Java 8 no additional steps are required.
4. SG V5 Applications
SG Systems will finally install a selection of V5 applications on the customer’s server. Again, this is determined by the originally specified scope of the system. This is accomplished via the use of the ‘SG Installer’. This installer can also be used to update apps in the future.
A guide on the use of the SG Installer can be found here
By default, the SG Installer will create a folder named ‘SG Software’ in ‘Program Files (x86) and place app installation folders in here.
Thus a standard installation of the SG Control Center will be installed the following location, unless stated otherwise by the customer:
This is the same for ALL SG applications, including SG Terminal, SG WMS, and the SG Data Engine.
An extra step is needed on all SG installations to ensure that SG apps can write to the configuration files inside the installation folder. Right-click the SG Software folder (located by default in C:\Program Files (x86)\SG Software) and click Properties. Then on the ‘Security’ tab, click ‘Edit’ then ‘Add’:
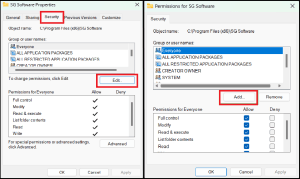
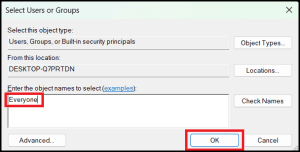
On the resulting window, type in ‘Everyone’ and click OK.
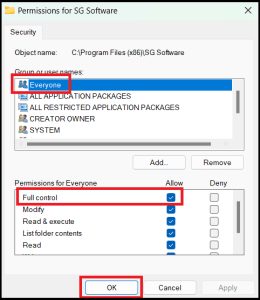
Finally, highlight ‘Everyone’ and check Full Control, before clicking OK.
5. Database Connection
To connect the app to the server, SG Systems use ‘.properties’ files, which are located in the ‘config’ folder of the SG application installation, and which can be opened and edited using a basic text reader such as Notepad.

The ‘db_settings’ file here is the one we want to edit in order to connect to the server. The ‘app_settings’ file here are the app settings, but are controlled via central configuration in Control Center itself, so will not be discussed here.
Opening this will show something like the below:

If you are using SQL Authentication, then the username and password are within this file along with the connection string.
5.1. Active Directory
If you are using Active Directory, then the database string will need to contain “IntegratedSecurity=true;”. The V5 software will then use sqljdbc_auth to authenticate the database connection using the windows account information.
If the devices/PCs are on a Domain and using SSO, then the V5 software will automatically startup after the connection to the database has been made. We do not have a username and password prompt to get into the V5 software because the user has already logged into the device using SSO so it isn’t necessarily needed.
So when using AD/SSO with V5, the main thing is to ensure that the SQL Database is sharing the same AD controller as the Windows devices so the database connection can be authenticated using the Windows account information. These Users will also need to be able to update/insert/delete database records.
6. V5 API
SG Systems offers full API integration with a wide variety of ERP solutions that customers may employ. If this is part of the implementation process then the V5 API will be installed alongside other elements of the V5 Traceability system.
The process that this will follow can be found in our dedicated V5 API Installation Guide.